Xubuntu Artwork Update: Unity Support

While there are many people who project a competition between Ubuntu and its flavors, I’d like to set a (small) sign that this is definitely not the case.

With respect to our default theme, “Greybird”, I have been striving to expand the supported window-managers in the last release “Oneiric Ocelot, 11.10” (metacity, emerald), to give people who want to use Compiz in Xubuntu an easy way to use our default look.

So for this cycle (“Precise Pangolin”) I started working on adding support for Unity in Greybird. Unfortunately there were so many things to do in the artwork-department during this cycle that I could only start a very short while ago, so we’re far past the freezes. So far our testers report that things are working well and if there are no blockers coming up, this will hopefully land in Precise via the -proposed repository.

Try for yourself!

You can try this version of Greybird even before it lands in any repository very easily by downloading the 0.8.1 release and unpacking the theme into ~/.themes (if that directory doesn’t exist, simply create it).

Unfortunately there is currently no built-in way of switching to any other than the short list of themes that Ubuntu ships by default in Unity, so those of you who want to give this a try will have to use something like “GNOME Tweak Tool”, “Ubuntu Tweak” or “My Unity”.

If you find any bugs please file them on launchpad! Thanks in advance and happy testing!

A few screenshots

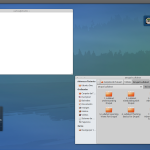
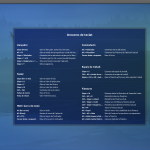
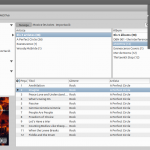
And finally, since everyone loves screenshots, here go a few of Unity with Greybird in action, taken by our tester Carlos.

  Greybird in Unity, Nautilus and gnome-terminal     

The author of this post is Simon Steinbeiß, who is the Xubuntu Artwork Lead. In addition to Xubuntu, he works extensively on the Shimmer Project and the Xfce Design SIG.

Window resizing in Xubuntu (and Xfce)

For quite a while now there has been questions about resizing windows in Xfce, especially with theme with narrow window-borders. Usually people would ask for wider window-borders, but there are several methods of resizing a window and the thin borders in Xubuntu’s current default theme Greybird are not as much of a usability issue as some suggest.

The five methods

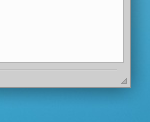
Method 1: Using the resize grip

Resize grips (usually small triangles) are positioned in the bottom right corner of a window, often as part of a statusbar. Before 12.04 (Precise Pangolin), Ubuntu had patched Gtk2 to add these resize grips to all applications. This would allow people to easily grab each window and resize it, even with theme with thin borders.

Unfortunately, this patch had some regressions; for example, clicking OpenOffice’s resize grip would open the file menu. The regressions made Ubuntu developers drop the feature from 12.04. Starting from 12.04, Gtk2 applications will have to use one of the other resizing methods for applications that don’t have a built-in resize grip. All the Gtk3 applications will have a resize grip in Greybird (Xubuntu’s default theme).

Method 2: Alt + right-click + drag

This is maybe the easiest and most useful way of resizing windows. I’m tempted to say that once you got accustomed to this it’s hard to go back. Simply hold the Alt key, right-click somewhere inside the window and drag to resize. It works intriguingly well and is a very nice complement to the easiest way of moving windows: holding Alt and left-click drag.

Method 3: Keyboard shortcut

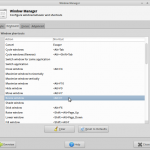
Xfwm4, Xfce’s window manager, supports a number of keyboard shortcuts (which can be edited by going to the Settings Manager > Window Manager > Keyboard). One of them is for resizing windows with your keyboard. There is currently no keyboard shortcut set by default, but you can set one in the Window Manager dialog.

As soon as your keyboard-shortcut (in Xfce upstream its Alt+F8) is hit, you can then resize the window by either moving your mouse (no need to click or drag) or use your keyboard arrow keys.

Method 4: Using the top corners of a window

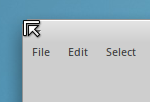
While the resize grip has been removed from Gtk2 in Ubuntu and isn’t present in every application, you can always resize windows by using the two top corners with the mouse. In most Xfwm4 themes the area of the top corners is large enough to easily grab and drag it with the mouse.

Method 5: Using the window-menu

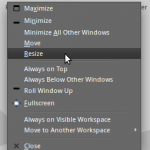
You can also initiate the same action as proposed in Method 3 above via the window-menu. Accessing the window-menu works either by clicking the menu-button in your window-titlebar (if your Xfwm4 theme has one), or by simply right-clicking the titlebar. There’s also a keyboard-shortcut to access the window-menu, but if you only want to resize the window, it’s easier to use the direct shortcut for that (again, see Method 3).

Example images


The author of this post is Simon Steinbeiß, who is the Xubuntu Artwork Lead. In addition to Xubuntu, he works extensively on the Shimmer Project and the Xfce Design SIG.

The Countdown is on

It’s already less than a month before Xubuntu 12.04 is released, and we thought it would be a good thing to finally provide you something to build up the excitement (and hype) with. So here it is…

Countdown banners for Xubuntu 12.04

The “normal”, legacy-sized banner:

Countdown to Xubuntu 12.04

…and the alternative, wide version:

Countdown to Xubuntu 12.04

How to add these to my site?

You only need a short snippet of code:

<a href="http://xubuntu.org/">
  <img src="http://xubuntu.org/countdown/" alt="Countdown to Xubuntu 12.04" />
</a>

or, for the wide version:

<a href="http://xubuntu.org/">
  <img src="http://xubuntu.org/countdown/?alt=w" alt="Countdown to Xubuntu 12.04" />
</a>

Beta 2 released & new branding

The Xubuntu team is proud to announce the Beta2 release of Xubuntu 12.04, Precise Pangolin!

Updates for this release include

Try it!

Visit the download page to give it a try. Be sure to report your testing results to help the Xubuntu developers – see the ISO testing tracker. Bugs can be reported in Launchpad. If you are looking for support, please see the #ubuntu+1 or #xubuntu IRC channels on irc.freenode.net. Before testing this release, make sure to review the release notes.

Our new branding

Along with the Beta 2 release of Xubuntu, we are proudly presenting our new branding, including a brand new and shiny logo, refreshed website looks and the few-days-old wallpaper for Precise. Our website also includes a page for Xubuntu marketing resources, including PNG and SVG versions of the new logo as well as some shiny, new web banners for public use.

Without further babble, our new logo in all its glory

Xubuntu logo, 2012 version. Light and dark background versions.

The new logo has a more condensed look and features a more saturated blue. To avoid being superfluous on blue, the logotype is printed on dark grey. It can also be easily replaced with white on darker backgrounds.

The picmark is still based on the Xfce mouse, but it’s more simplified and designed to work better in different contexts and sizes. While the picmark has lost some similarity with the Xfce mouse, reducing the complexity is a logical step from the last logo change.

Xubuntu Precise wallpaper: a better experience for dual-head users

The new wallpaper consists of two parts to give dual-head users a better experience with default wallpapers for once. Here’s the wallpaper in one, wide piece.

As some of you notice, the wallpaper has lots of elements previously seen on the Xubuntu wallpapers. That’s right, it’s intentional. Time to give some homage for the old times. We don’t want to go too rusty or dusty, so there’s some nice green stuff in, too.

The right side of the wallpaper with the flying bird will be the default wallpaper. If you don’t like birds, rather just watch a more plain wallpaper, need to set a wallpaper to the other monitor too or just for fun: we encourage you to try out the left side too!

There’s no certainty that we will keep on providing these wide wallpapers in the future releases, so starting from now is the right time to give feedback. Do you love it? Do you hate it? Should every operating system provide such wallpapers? Should we stick to providing one wallpaper only to keep the decision-making to a minimum? Express your thoughts at the Xubuntu-devel mailing list or the #xubuntu-devel IRC channel on Freenode.

Help test Xubuntu!

Xubuntu Beta 2 is coming out this week and we need testers!

Testing is an excellent way to get involved with Xubuntu. It’s a vital part of our release cycle and anyone with a virtual machine (or even better, a spare computer!) can help out with it.

The Xubuntu community maintains extensive documents related to testing, we highly recommend you browse through these as you get more involved with testing:

https://wiki.ubuntu.com/Xubuntu/Testing

But as a quick start…

Testing Xubuntu is made up of two key sections:

The Xubuntu Testing Info page, explaining more about the testing process, including which tests you should conduct.

  • The Short Test page, containing specific instructions on how to perform a basic test of Xubuntu. This page includes procedures for both the desktop cd and post-install testing.
  • The Long Test page, containing instructions on how to perform a more thorough test of Xubuntu.

The QA ISO Testing Tracker page, where testers should report their ISO test results.

  • This tracker is used by both the Ubuntu Release Manager and Ubuntu QA to determine which images will be released for any given milestone.

These two testing methods are typically used in tandem, but when you’re just starting out you can “get your feet wet” by trying what you’re most comfortable with. You may notice that our testing document document includes more fine-tuned distinctions between Daily images and Milestone releases with specific tests we ask people do for each which will help determine whether we’re moving forward with a specific milestone release.

To do either of these, you’ll first want to download the ISO as documented on the Testing Info page.

Once you have your .iso file:

  • Burn it to a CD-ROM
  • Put it on a USB stick (try usb-creator-gtk or UNetbootin)
  • Use the ISO to load up a new virtual machine in VirtualBox (or similar)

Now you can select what tests you wish to run. Can you do an install to test the ISO on the QA ISO Testing Tracker? Or perhaps just do a live session where you do a Short Test?

While doing these tests  it is important to file bugs. If you find a bug, please, search if it has already been reported, and if it hasn’t, report it yourself. You should also refer to the debugging guide for that specific package (if available) to make sure you are aware of known issues and have attached the relevant log files.

Have any trouble? Have any questions? Not sure where to report a bug, or if it’s a bug? Join us in #xubuntu-devel on irc.freenode.net (use a client, or access via your browser here) or on the xubuntu-devel mailing list. Please be patient when using either of these resources, our team is small so it may take us some time to respond.

Happy testing!

Older posts Newer posts